URL: https://it.desy.de/e5/e47139/e283790/e284022/index_eng.html
Breadcrumb Navigation
First steps with DESY Sync and Share
In the following the basic use of the DESY Sync & Share service via the web browser is described.
Login
If you have been granted access to the DESY Sync & Share service (by the UCO or your namespace administrators), you can log in via https://syncandshare.desy.de, among others. All other aliases like sas.desy.de redirect to https://syncandshare.desy.de. Namespace administrators have to apply for activation via the UCO if they want to add access for DESY user accounts of their group (via DESY registry resource) themselves.
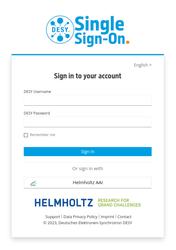
For the login you will be redirected to keycloak.desy.de. There you can log in with your DESY account name and the corresponding DESY password (Figure 1). After entering your password, you will be asked for a one-time password. Please enter the current 6-digit one-time password of your token and confirm.
Overview
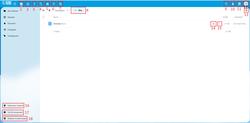
After logging in, you will be taken to the main page of the DESY Sync & Share service. Here you can create new folders, upload/download files and share files. The following picture as well as the corresponding legend below the picture should first give you a rough overview of the start page of the web interface and its functions.
|
1. Files: All the folders and files present in the cloud are displayed here. |
10. Notifications: Notification for Federal Shares and the like are displayed here. |
Create folder
rename folder and files
Uploading folders and files
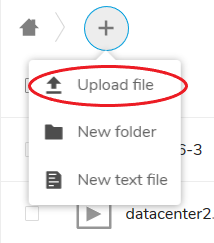
If you want to upload some files, click the corresponding folder, on the plus icon and on "Upload File" (Upload file). An new window opens where you have to choose your files. It is also possible to use the drag & drop function.
Downloading files and folders
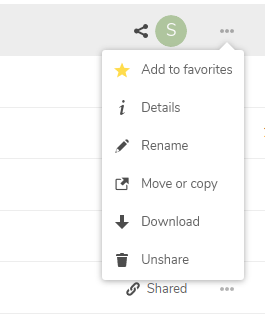
To download a file or folder, you have to click on the 3 dots on the right side of the file you want to download, as in "Rename". Then a window with different options will open, now select "Download". You can now specify the storage path of the file/folder.
Navigation through your folders
The menu on the left is helping you to get an overview of your contents. If you want to get back to the "main" screen just click on the house icon.
Sharing of files and folders
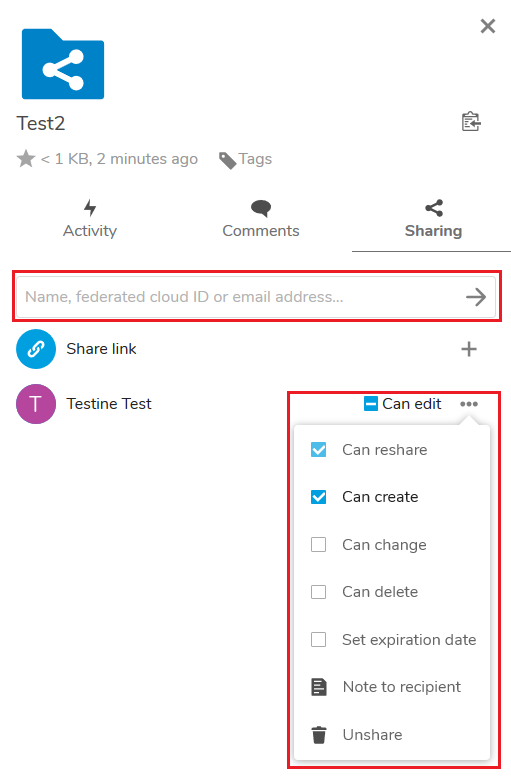
If you want to share a file or folder, click on the "sharing" icon. A window opens in which you can select a person or group (from the DESY Registry) who should then be able to download the content. Sharing files with persons always leads to an E-Mail notification with the chosen user.
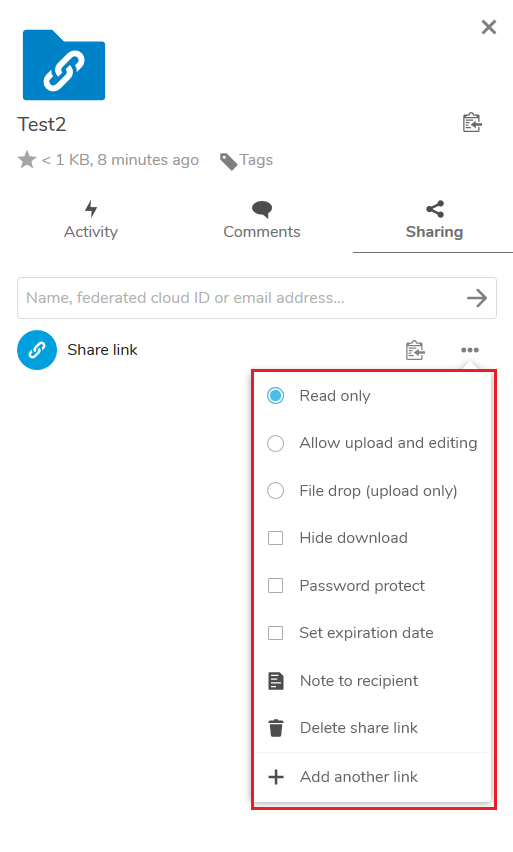
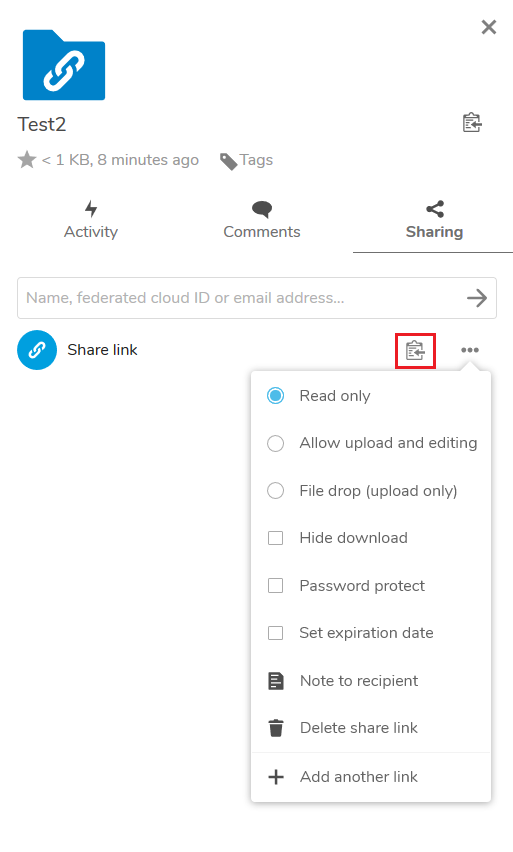
If a person should not have direct access to DESY Sync and Share you can create a "Public-Share". DESY Sync and Share will create an encrypted link, which grants access to the chosen files. Just click "Share link" and copy the URL and send it to the chosen recipient by mail.
Additional features are:
-
Read-Only
The recipient can only view the files, he will not be allowed to edit or delete them.
- Password protection
Enables the possibillity to protect your public share with a password. Only the recipient knowing link and password can access the shared file .
- Allow editing and uploading
Possibility to upload and edit files to a folder for people without access to DESY Sync and Share. This is a folder option only.
- Expiration date
You can specify that a file or folder can only be shared for a period of time. After expiry only the sharing right expires, the folders/files are not affected.
To send the configured link by mail or via another medium, you have to click on the button marked in the photo and the link will be saved in the clipboard.
Tag Function
With the tag function you can tag folders or files with useful search terms to find the files even in a large megabyte of data easily and conveniently using the search function. These set tags remain permanently with the shared files. So CAUTION with the tags, everyone who has been shared the file can see the tags.
To add tags to a file, click on the file and (as described in the following photo) click on the tag icon, then an input field will appear. Insert the desired tag here and confirm with "Enter".


