
URL: https://it.desy.de/services/druck/guest_network___wlan/printing_from_windows_11/index_eng.html
Breadcrumb Navigation
Printing from Windows 11
Printing from within the DESY-Guest network and Eduroam
Some of the printers in the DESY-network can be used from within the guest-network (Science Hotspot): Desy Guest Network Printers.
Printing jobs from the guest-network will be marked as "GUEST" or "NOBODY" and the used "Device name" on the green/blue cover sheet.
General:
Printing from the guest-network works via the IPP-protocol and a driver that has to be installed and configured locally on your device (depending on the model of the printer).
Quick Guide:
- Find and note printer name and model (https://desyguestprint.desy.de/printers/)
- Find correct driver
- Unpack and install driver manually
- Add printer in Windows
- Set correct driver
- Configure accessoires (Depends on model)
Instructions with screenshots:
Find printer/driver
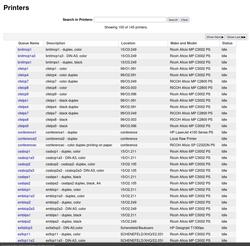
First, you will need the name and model of the printer you want to use.
For this, go to https://desyguestprint.desy.de/printers/ and look for the correct printer within the list. Remember the name ("Queue Name") and the model ("Make and Model").
")

")
Install driver
To use the wanted printer, you will have to install the corresponding driver first.
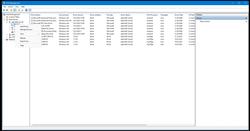
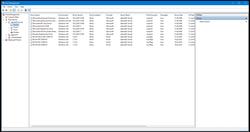
To check if a particular driver is already installed, you can check in the Windows "Print Management".
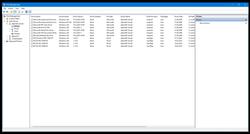
")
If the needed driver is already installed, you can skip these next steps. (Continue with "Printer setup").
If the driver isn't installed yet, you will have to do so first.
To do this, download the driver from the RICOH-website (Choose PS3/PostScript driver if available).
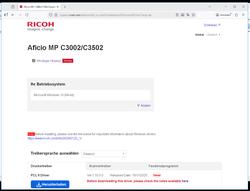
")
")
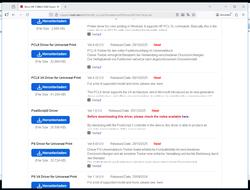
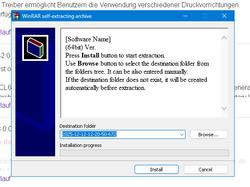
Download the correct driver-file and save it in a folder of your choice (remember where it's saved).
Then unpack the file.
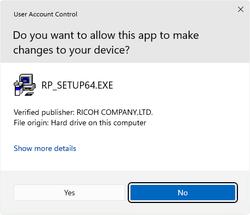
If a prompt shows up asking you to make changes on your device (see below) please press No. The installation will be done manually.
")
")
Open the Windows Print Management and go to "Drivers" -> "Add Drivers".
")
At the "Printer Driver Selection" step (see figure below), select the option "Have Disk...".
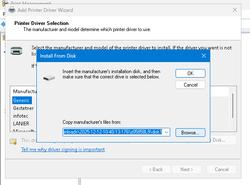
")
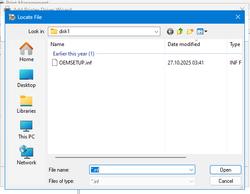
The driver-file you unpacked earlier contains a folder called "disk1".
In this next window, open the .inf-file within this "disk1".
")
Lastly, select the manufacturer (RICOH) and set the correct printer-model (the one noted at the beginning of this guide).

")
The driver should now be installed and show up in the Print Management list.
")
Printer setup
If the required driver is installed, you will now have to setup the printer within windows to use it.
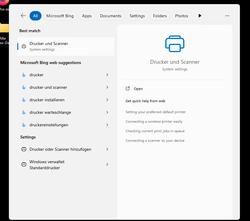
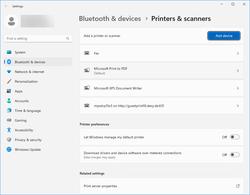
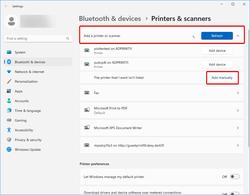
To do this go into the "Printer and scanners"-settings.
")
")
First, click on Add Device and then Add manually:
")
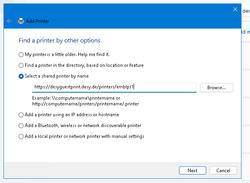
Now select the option "Select shared printer by name" and enter
http://desyguestprint.desy.de:631/printers/<printername>
<printername> is replaced with the name of the printer you want to add
Example with the printer-name "emblps1":
")
Now the correct driver has to be selected, if it's not already configured automatically.
Lastly, you will have to configure additional accessoires for the printer. (Most importantly the Input-trays!).
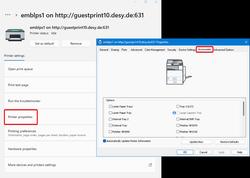
To do this, go to the newly configured printer and select "Printer properties".
Now, go to the tab "Accessoires" and select all wanted/available options.
What these are depends on the model of the printer.
")
The printer is now set up and can be used from the guest-network.