
URL: https://it.desy.de/services/storage_services/desy_sync__share/configuration_of_your_nextcloud_desktop_client_for_desycloud/macos/index_eng.html
.
Breadcrumb Navigation
Nextcloud Client on macOS
This web page describes how you can view and work with your Sync & Share data directly in Windows Explorer. By not having the data locally, you save disk space compared to using the Sync & Share client. However, this may slow down access to the data at times because it is an active connection.
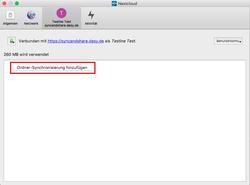
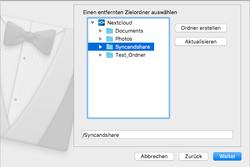
Setup the Client
|
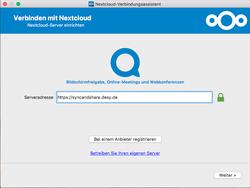
")
Figure 1
|
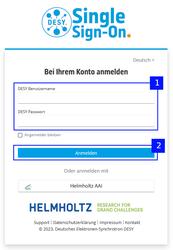
")
Figure 2
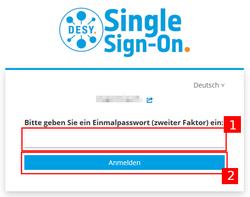
")
Figure 3
|
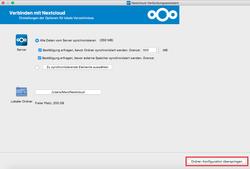
")
Figure 4
|
")
Figure 5
|
")
Figure 6
|