
URL: https://it.desy.de/services/windows_terminalserver/working_with_winterm/index_eng.html
Breadcrumb Navigation
Working with winterm
|
|
|
|||||

Working with winterm |
Please note the following recommended working methods when working with the Windows Terminal Server:
-
Store unrecoverable data only on the network drives (H :, N :), not on the desktop
-
Lock the screen when you leave your computer
-
Log off after a Terminal Server session (see the section titled "Logout / Lock / Disconnect" below)
Logout/Lock/Disconnect
There are two ways to end a session: Log out or disconnect. Unlike logging out, disconnecting causes disconnection from the existing session. The session persists on the terminal server and can be reactivated by reconnecting within an hour, otherwise the aborted session is removed from the system.
Log out or lock session
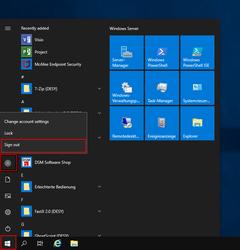
To log out of the terminal server, click on the Windows Start button, then on the user icon and select the point "Sign out" (Fig. 1). To only lock the session, select the "Lock" menu item instead.
")
Figure 1
Disconnect session
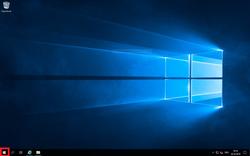
To disconnect your session, click the x icon at the top of the connection window (Fig. 2). The bar appears when you move the mouse pointer to the middle of the upper window area.

")
Figure 2
Save/exchange data
Saving data
As on any Windows system, it is also possible on winterm to store files on the Windows desktop. However, this is urgently to be discouraged because the data located on the desktop is saved as part of the user profile and also deleted in this context when deleting the profile. The deletion of user profiles is performed when an account has not logged on to the Windows Terminal Server for some time. As a result, the files on the desktop are also deleted.
Therefore, on the desktop, if necessary, only links should be created to, for example, data in H :.
Exchange of data
At the moment (10/19) there is no stable AFS client version available (see also section Known problems in this documentation), for this reason, apart from that, it was refrained from providing an AFS client on the terminal server. For this WinSCP in particular represents a possible solution for the direct exchange between the AFS and the Windows terminal server. Here are some ways to exchange data between the Windows Terminal Server and centralized storage systems.
Windows network drives (H:/N:)
Since the Windows network drives are integrated by default on the Windows terminal server, data can be stored there and retrieved in the same way on any other DESY Windows computer.
It is usually also possible to integrate the Windows network drives on Linux systems. Instructions can be found on the following website: http://it.desy.de/dienste/uco/dokumentation/win_netzlaufwerke_smb
DESY Sync & Share
If you have access to DESY Sync & Share, you can store data in your personal data cloud area by visiting the DESY Sync & Share web interface: https://sycandshare.desy.de. You can then download this data again using the same path on another system. Documentation on DESY Sync & Share can be found on the following website: https://it.desy.de/dienste/speicherdienste/desy_sync__share/index_ger.html
WinSCP
Another option is to copy data directly between winterm and another device using WinSCP. This is especially recommended if you want to exchange data between winterm and your AFS directory. The following is a brief explanation of how to connect to the pal and so on to your AFS directory using WinSCP.
-
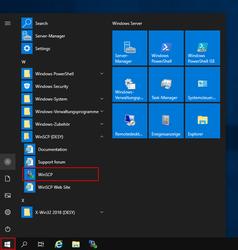
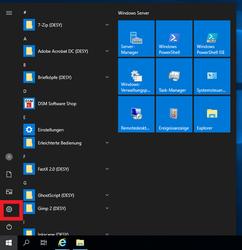
Click on the Windows Start button (Fig. 1)
-
In the start menu, expand "WinSCP (DESY)" and click on "WinSCP" (Fig. 1)
")
Figure1
-
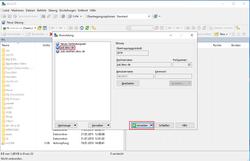
Select from the preset connections "pal.desy.de" (Fig. 2)
-
Click on the "Login" button (Fig. 2)
")
Figure 2
-
If you receive a certificate warning, confirm it by clicking on "Yes".
-
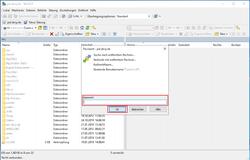
Then enter your password and click on "OK" (Fig. 3)
")
Figure 3
After successful connection, you will see your Windows home directory in the left area and your AFS home directory in the right area. You can now copy data between these two areas in one direction or the other.
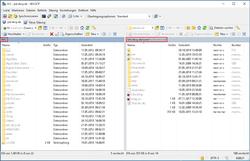
")
Figure 4
Printer installation
-
Click on the Windows Start button (Fig. 1)
")
Figure 1
-
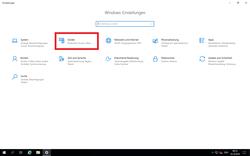
Click on the gear on the left edge (Fig. 2)
")
Figure 2
-
Click on "Devices" (Fig. 3)
")
Figure 3
-
Click on "Printer and Scanner" (Fig. 4)
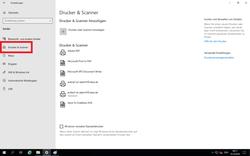
")
Figure 4
-
Click "Add Printer and Scanner" (Figure 5)
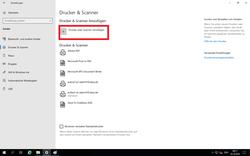
")
Figure 5
-
Click on "The desired printer is not listed" (Fig. 6)
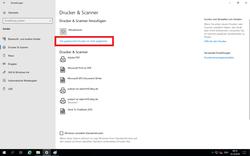
")
Figure 6
-
Now enter the complete path to the printer (Fig. 7)
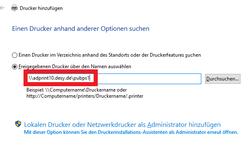
")
Figure 7
Language Settings
The language of the Windows terminal server system winterm can be switched between English and German by each user as follows:
- From the Start menu, select 'Einstellungen'
- In the now appearing window click 'Zeit und Sprache' (view: Icons)
- Switch to the next window, click the tab labeled 'Sprache'
-
Click on 'Nein' in the window that opens several times. (Figure 1)

Figure 1
5. Under 'Windows display language' select the option 'English'
6. Click on 'Nein' in the window that opens several times. (Figure 1)
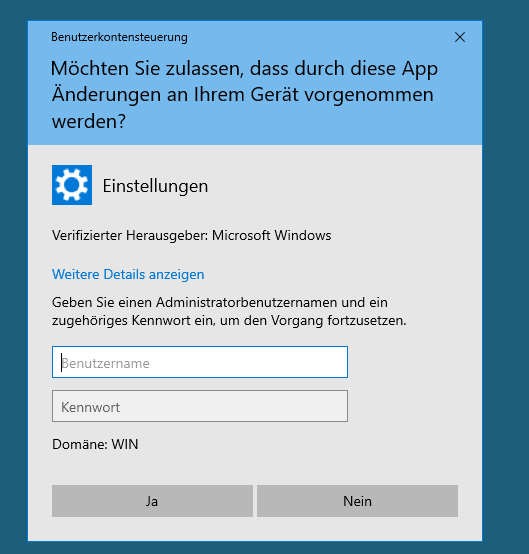
Figure 1
7. You must log out and restart the session for your settings to take effect.