
URL: https://it.desy.de/services/uco/documentation/secured_printing/@@siteview
Breadcrumb Navigation
Secured Printing
Usually prints on DESY printers are just printed out without further actions after sending the job.
In the case of confidential documents - like personnel records or paychecks - this can mean that further people may be able to see those documents.
To protect against that there exists the option of secured printing. With this, documents will only be printed after entering a self-given password at the printer itself.
Please note: Secured printing is currently only available on Windows and MacOS.
Content
How to use secured printing
Please note that secured print jobs only get saved for 1-3 days on the printers and can only be executed in this time window.
Step 1: In the document to be printed (in this example Word) please go to "File" and the sub option "Print".
Step 2: Under the selected printer is the button "Printer Properties", please click on it.

")
Step 3: In the opened window click on "Job Type" and then on "Locked Print". After that click on the option "Details" on the right to set up an user ID and password.

")
Step 4: In the newly opened window select "Create own ID" under the drop down menu "User-ID". Now you can enter your user-ID in the right field. You can choose anything with letters or numbers up to 8 characters. After that enter your password/PIN (only numbers, 4 to 8 digits) in the bottom field. You will have to retype this password on the printer afterwards.

")
Printout
Step 1: Tap the home-button to get to the main menu.
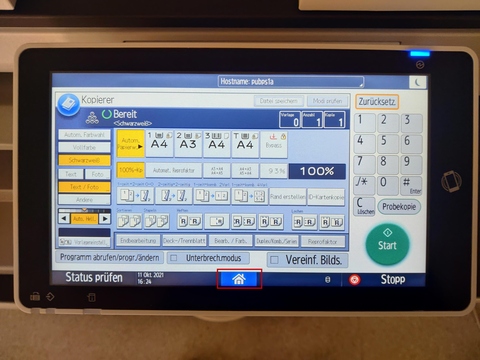
")
Step 2: Select "Printer (classic)".
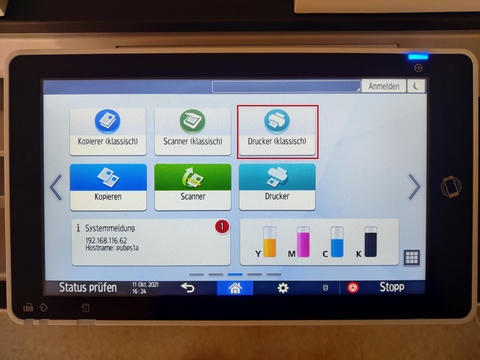
")
Step 3: Navigate to "Print Jobs".
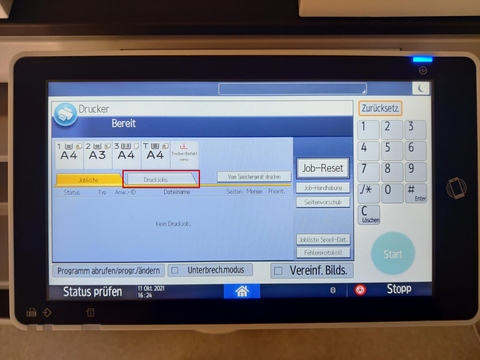
")
Step 4: This is a list of all pending print jobs, here you can select your own job.

")
Step 5: Here is a list of jobs under your name.
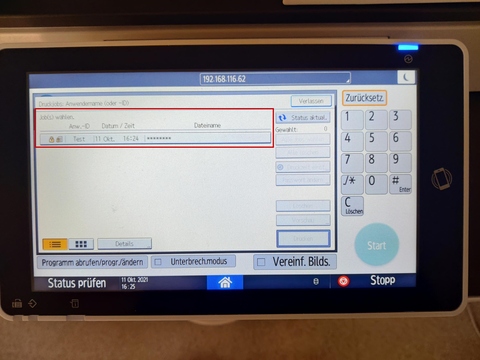
")
Step 6: After selecting your job you can print, preview or delete it.
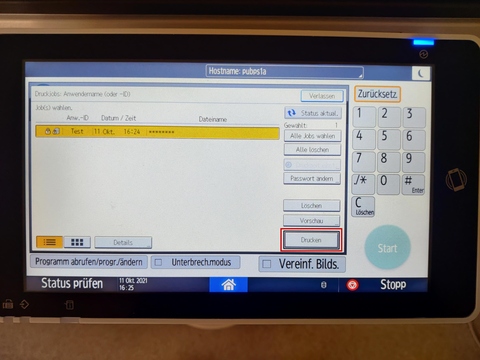
")
Step 7: After entering the PIN you gave at the computer the job will be executed.
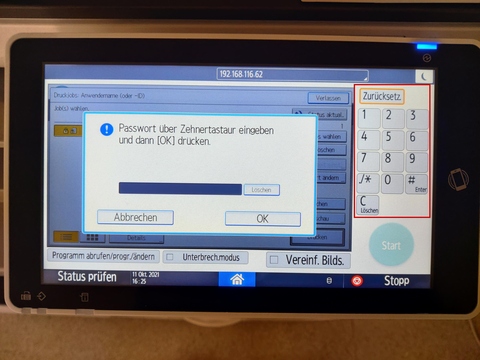
")
Common questions and problems
Which printers do have the "secured printing" capability?
Currently the function "Secured Printing" is only available on multifunctional printers, meaning printers with built in scanners.
Apart from very few exceptions, normal printers cannot provide secured printouts.
How long can you access the print jobs on the printer?
After creating a print job on the computer, it is available for 1-3 days on the printer.
Only in this time you can access the secured print jobs.
Only a cover page has been printed
Currently when creating a print job, a cover page will always be immediately printed.
The actual document however will only be printed when executing it by entering the password on the printer.